
How to Bookmark and Tag a PDF Using Adobe Creative Suite
May 14, 2013 Accessibility Publisher Advice- How to Bookmark and Tag a PDF Using Adobe Creative Suite
- Tips for Blogging from Microsoft Word
- Prepare Your Game Manuscript to Send to Layout Pt. 1
- Prepare Your Game Manuscript to Send to Layout Pt. 2
- Prepare Your Game Manuscript to Send to Layout Pt. 3
- How to Import a Manuscript to InDesign CS6
- The Secret to Simple Manuscript Import with InDesign CS6
- How to Apply GREP Quickly with InDesign Scripts
- Making Magic Happen with GREP
- Keeping Your Text Flow Flowing: Removing Text Dams
- So What Does an Accessible PDF Look Like?
- Layering Your PDFs Using Adobe InDesign CS6
- Why Accommodating Others is Your Best Investment
- Uploading Unwatermarked PDFs to DTRPG
- Accessible PDFs with InDesign Alternatives
- Prepare Your PDF for Print
- Accessible Guide to RPG Layout Now Available
- Organizing Your Files to Send to Layout
Introduction
PDF bookmarks are great. They can serve both as a table of contents and a quick navigation tool for all users. Tablet and desktop users alike appreciate the ability to jump to specific sections of a book without having to navigate back to the Table of Contents, look up a page number, and then search for that page number. Best of all, they’re not very difficult to add to your documents.
In this tutorial, I’ll walk you through creating bookmarks using Adobe Creative Suite, which includes InDesign and Acrobat Pro. For the purpose of this tutorial I will be using CS6, or version 6 of the creative suite, but many of these features have been around since earlier versions.
As an added bonus, you’ll also learn how to create tagged PDFs which tell screen reader software how to read your document to blind and low-vision users. This step is usually as simple as clicking a single checkbox.
Setting Up Your Document
Before you begin adding bookmarks to your PDFs, you need to set up the document to help automate the task. You can edit and add bookmarks later, but by performing these simple steps you will save yourself a lot of trouble.
For this tutorial, I will assume that you are comfortable using basic features of InDesign and that the text of your book is already added to the document.
Setting Up Your Styles
If you imported your document from another program, such as Microsoft Word, InDesign can import your styles for you. It’s not always perfect so you will probably need to do some tweaking, but it can still save you a lot of time and energy.
The key thing you need to remember when setting up your styles is that you need to use some form of Heading style to denote each major section of your book. Ordinarily I use Heading 1 for chapter titles, Heading 2 for major sections, Heading 3 for major sub-sections, and Heading 4 for minor sections. Depending on your needs and preferences you will probably only bookmark items that are styled as Heading 3 or above.
Not sure what Headings and Styles are? Microsoft has put together a handy tutorial for Word. Here’s one for LibreOffice.
If you’re starting from scratch or need to edit your imported styles, follow these steps.
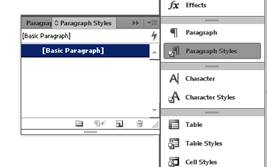
1. Make sure you can access the Paragraph Styles panel. If it’s not visible on your screen, select the Window menu and then Workspace -> Typography.
2. Open the Paragraph Styles panel.
3. Open the Paragraph Styles Options dialog (click the button in the top-right corner) and select New Paragraph Style.
4. In the Style Name box of the New Paragraph Styles window, enter “Heading 1.” (You don’t have to name it Heading 1, but it is a widely used title and that’s what I’ll stick with in this tutorial.)

5. Select the style options you would like, such as font face, font size, indentation, etc. Most of the options you will change are under Basic Character Formats and Advanced Character Formats in the list on the left-hand side (see picture above).
6. Click OK.
Now that you have your first paragraph style set up, add new styles for Headings 2 through 4, or whatever suits your document. You can add new styles by repeating the process above, or you can select Duplicate Style… instead of New Paragraph Style in the options dialog to create new headings based on your previous entries.
Applying Your Styles
After you have your basic styles set up, you’ll apply them to your document.
1. Press T or click the Type Tool button on the toolbar to enter typing mode.
2. Select text that you want to apply a style to. For example, we’ll add the Heading 1 style to the “Chapter Title” text.

3. Click Heading 1 on the Paragraph Styles panel. Your text style is applied.

4. Repeat these steps to apply Heading styles to all of your section, sub, and minor headings.

From this point on, I’ll assume you have laid out your book entirely and set up your Headings appropriately.
Create a Table of Contents
We’ll set up your Table of Contents and tell it to automatically create bookmarks. This will do two things for you when you export your InDesign file to PDF:
1. Your Headings will appear on the Bookmarks toolbar in Acrobat and be fully functional.
2. Your Table of Contents will automatically be linked to corresponding pages as well—users will be able to click text directly on the Contents page and jump to the section they’re looking for.
Let’s begin.
Inserting a Blank Page for your Table of Contents
1. If you didn’t leave a blank page at the beginning of your document for a Table of Contents, create one now. Click the Pages panel at the top of the toolbar. Then click the Options button in the top-right corner and select Insert Pages…
2. On the Insert: drop-down menu, select Before. Leave the page number set to 1 and the number of pages set to 1. Also leave Master set to A-Master unless you’re familiar with using Master Pages and wish to select something different.
3. Click OK.

4. A new blank page is created and automatically selected.
Create your Table of Contents
Now that we have a place to put it, we’ll create the Table of Contents.
1. On the main menu, select Layout then Table of Contents. The Table of Contents dialog box opens.
There are a lot of options here, but we’re going to keep this simple. Feel free to experiment with other options if you wish.

We need to select which sections we want to go into our Table of Contents, which will also be the sections that are automatically bookmarked. If your book is long or has a lot of sub-headings and minor headings, you may wish to avoid putting those in your TOC to keep it short. Since my document is short, I’ll include all of them.
2. Under Other Styles, double-click on each of the heading types you wish to include in your TOC. Alternately you can select the styles and press the <<Add button (hold Shift to select multiple styles at once.)
3. Under Included Paragraph Styles you will now see all of the styles you selected. Click Heading 1 to highlight it. The bottom pane will refresh to show you options related specifically to Heading 1.
4. Under Style: Heading 1 you can select the style you wish the text to display in your Table of Contents. If you select Same Style your TOC will use the Heading 1 paragraph style you set up earlier. In some cases this text might be too big, or it might be indented or centered in a way that makes it awkward on the page. You can set up separate paragraph styles using the steps outlined above to customize the way your TOC looks. Since I didn’t do that, I’m just going to select Same Style.
5. Here’s the important step. Make sure you check the Create PDF Bookmarks box under the Options section. This is what we’ve been looking for the entire time.
6. If necessary, select each of your Included Paragraph Styles and choose which style you wish to use for their TOC entry, then click OK.

7. Click your mouse anywhere in the text frame on your blank page to insert the Table of Contents.
You’ve just created a Table of Contents that will function properly after we export it to PDF form. It isn’t very pretty yet, but that’s okay—we’re learning.
There is a lot you can do to style your Table of Contents, and I especially recommend playing with Tabs and Leaders. Making your TOC look pretty is beyond the scope of this tutorial.
Exporting Your Bookmarks to PDF
When you’re ready to export your document to PDF, make sure you follow these steps to ensure all that hard work you did earlier pays off.
1. Click File > Export… to open the Export dialog box.

2. Pick a place to save your file and give it a name. Under Save as type, select Adobe PDF (Print) and click Save. The Export Adobe PDF dialog box appears.
3. In the upper-right corner of the dialog box under Compatibility, select Acrobat 8/9 (PDF 1.7). This isn’t 100% necessary, but using the newest version of Acrobat will ensure all of the features we use are exported properly, so I recommend it.

4. There are a lot of settings to choose from, most of which are beyond the scope of this tutorial. Of interest to us right now are the settings under the Options and Include sections.

Under Options, make sure that Enable Page Thumbnails and Create Tagged PDF are both checked. I also like View PDF after Exporting (which simply launches the PDF file in Acrobat so you can view the final product) and, if I am using layers to create printer-friendly versions of my documents, I like to check Create Acrobat Layers as well.
5. Under Include, make sure Bookmarks is checked.
6. Finally, click Export. In a few moments, if you have View PDF After Exporting checked, your PDF should open in Adobe Acrobat.
Verify Your Work
Now that you’ve exported your tagged, bookmarked PDF, it’s time to make sure everything worked out properly. We’ll perform a couple of manual checks to find out.
1. With the new PDF open, hover your mouse over any of the entries on the Table of Contents page. Does a hand icon replace your mouse cursor? If so, that means you’re able to click on the entry and skip to the appropriate section of your document. Give it a try, then come back to Page 1.
2. Open the Bookmarks panel by clicking the Bookmark icon on the left-hand side of the Acrobat window. The Bookmarks panel will appear. Note: For this tutorial, I am using Adobe Acrobat X Pro under Windows 7.

3. Click on the entries in the Bookmarks panel. Notice how the PDF jumps from section to section as you click through them. If each bookmark functions as expected, congratulate yourself on completing all of the steps accurately.
Test PDF Tagging
We still need to test that PDF tagging. Tagging tells screen readers how to read your document. You don’t need to have a screen reader installed on your computer to test this out though; Acrobat has built-in reading tools that you can use.
1. Navigate to the first page of text in your PDF.
2. Click View > Read Out Loud > Activate Read Out Loud. A white box will appear around the first paragraph of text and you should hear a robotic voice read the first line.

3. Use your keyboard’s arrow keys to move up and down. As you do so, the box will highlight subsequent paragraphs and read them aloud to you. You can also click any line with your mouse cursor to highlight and read that line.
4. If you have text boxes or sidebars in your document, navigate to a page that contains one of them. Select View > Read Out Loud > Read This Page Only. Observe how the screen reader reads this page to you. Is the text box read aloud to you? If it isn’t, go back to your InDesign file, right-click on the text box that isn’t being read aloud, and select Autotag. Export your PDF file using the steps outlined above and test it again.
Conclusion
You’ve done it! You now have a fully tagged, fully bookmarked PDF. Everyone will thank you for having a document that is much easier to navigate, and users of screen reader software will thank you for having documents that are accessible to them.
This isn’t the end of the road for accessibility and bookmarking. You can create bookmarked indices, create hyperlinks to websites to make your documents more interactive, and even manually create bookmarks from any part of your document to any other part. Ever wish you could click on “see page 42” and have it take you to page 42? Yep, you can do that).
The export process is the same, but creating bookmarks manually takes a few more steps. Feel free to experiment a bit with InDesign and see if you can get it to work (hint: highlight some text, right-click, and explore the Interactive options).
Do you have any questions or comments? Do I need to elaborate on any particular step? Let me know in the comments or contact me and I’ll be sure to update this tutorial.
Download
Would you like to take a look at the source files I used to create this tutorial? They’re incredibly basic, but you can see how the bookmarks and tags work. You will need Adobe InDesign CS6 to open the INDD file, but you only need the free version of Acrobat Reader to open the PDF.


